Make your business work smarter
With Clover's smart apps, you can do more with less. Whether you want to decrease the time you spend on admin, keep a better eye on your stock, or to create loyalty programs for your best customers - with Clover you can do it all.
Apps to turn your customers into fans
You take care of your customers without worrying about payments. Our payment solutions help you focus on growing your business. It pays off.

Discounts (Free)
Easily create discounts on products or a total amount. Reward your regular customers with special offers.

Customers (Free)
Manage your customer base with this handy app. View previous purchases of returning customers and use this information for marketing purposes.

LoyLap (Paid)
With LoyLap's apps, the customer is king. Create gift cards or set up complete loyalty programmes for regular customers.
Apps to run your business smarter
Clover has specially designed apps to manage your employees. With these, you don't need to use any other software or tools. Everything is simply in the Clover system.

Employees (Free)
Set up accounts per employee and Clover keeps track of all sales per employee. Specify which actions each person is allowed to perform: payments, refunds, discounts, etc.

Shifts (Free)
Have your employees clock in and out via Clover. This allows you to see in one overview how long someone has worked and what their turnover is on a day.

Reporting (Free)
As a manager or business owner, this app allows you to see a total overview of your sales, employees, card and cash payments and much more.
Apps to grow your business
Dedicated apps aimed at selling your products. Turn your payment terminal into a full cash register system.

Register (Free)
Create orders and accept payments. Add stock items, apply discounts, specify additional charges or accept payment in multiple transactions.

Inventory (Free)
Add products to the Clover stock and manage them via the payment terminal or from the Clover Dashboard. This way, you always have an overview of your stock level and know when to buy.

Orders (Free)
Keep track of all placed and open orders and payments throughout your shop. This way, you can see which customer still needs to pay or easily issue a refund if a customer returns a product.
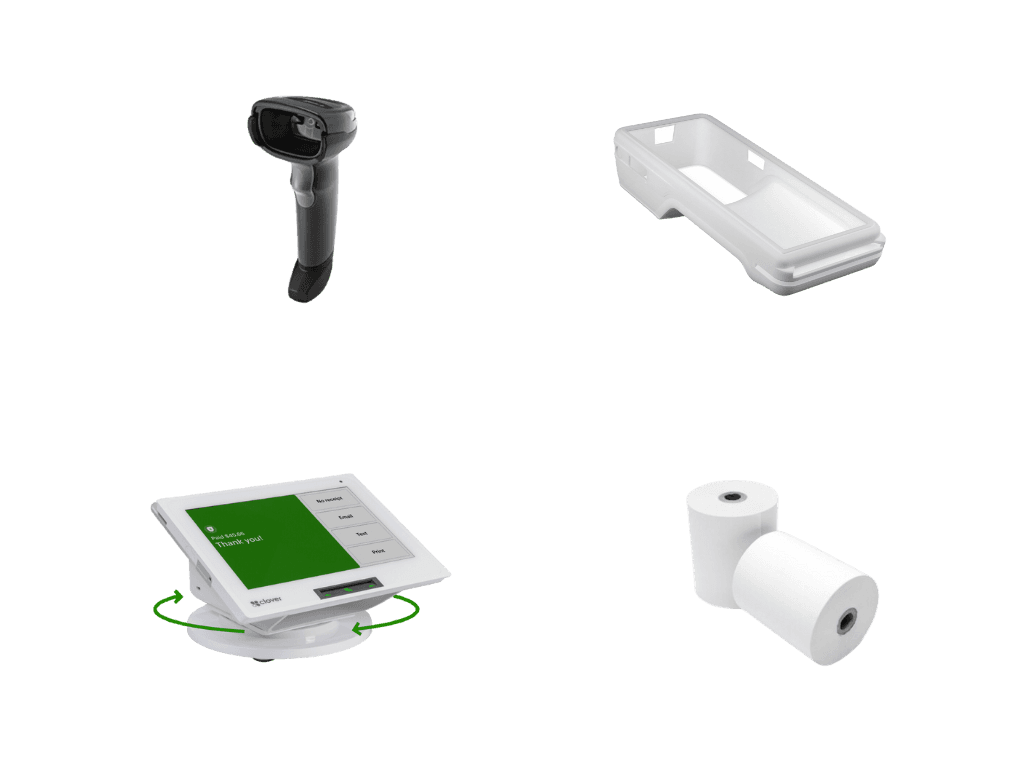
Discover accessories for your Clover
Clover's range of accessories help you get the most out of our POS systems, and work perfectly with its smart apps. Whether you want to scan barcodes, print labels or protect your Clover, we have everything you need.
The benefits of Clover via EMS.

Affordable fees
Besides transaction fees, you always have to deal with fees for payment terminals and service. With EMS, all costs are transparent. Also, you don't need an additional payment processor.
Accept more payment options
Don't leave any more transactions lying around, accepting the most common payment cards and credit cards at competitive rates.

Reliable
With an uptime of > 99.9%, you can always rely on us. In addition, we have PCI DSS v4.0 certification and you can be sure of secure payments.

Local partner
With EMS, you have your payment terminal and payment processing all with one party, with a local support team. More than 26,000 satisfied customers have gone before you.

Smart apps
Thanks to smart apps, Clover helps your business grow. With apps, Clover becomes a complete cash register system, stock management system or loyalty system.

Better connectivity
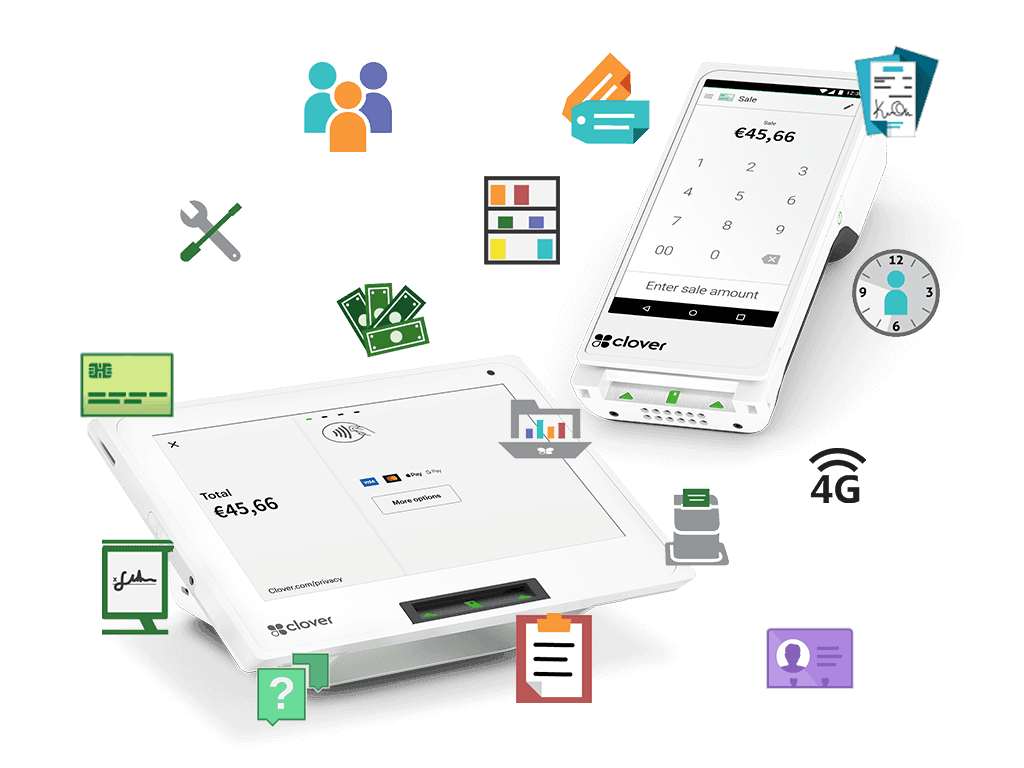
Thanks to 4G and WiFi connectivity on our Clover payment terminals, you can accept payments anywhere in your business.
Get Over €500 Off Clover* now, when you switch to EMS.
Fill in the form, and one of our agents will contact you to make sure you can accept payments as soon as possible.
No rental fees and pay only €1 subscription fee per month for the first year
No start-up costs (worth €50)
Always transparent and low transaction fees.
Veelgestelde vragen over Clover Apps
You can use the Pay App for a basic sale. Enter the amount of the sale and swipe the customer's card. Accepted methods are swipe, chip and contactless payments.
Taking a payment via strike-through
You can swipe a payment card in the Payments app when a payment is made. However, if a customer has a chip card (with EMV chip), we recommend inserting the card when paying to avoid EMV-related chargebacks once customers do not use the chip function.
Open the Pay App on your Clover device.
Enter the sale amount and tap Checkout.
If you enabled Ask for a billing number (or your custom identifier), enter an identifier and tap Continue.
Get the payment card through. (For Station Duo, have the customer swipe the card on the Mini terminal facing the customer).
If necessary, ask the customer to enter a PIN or sign a signature.
Select how customers will receive their receipt or tap Cancel Transaction to invalidate the payment.
Tap Done.
Taking a payment with chip card
Open the Pay App on your Clover device.
Enter the sale amount and tap Checkout.
If you enabled Ask for a billing number (or your custom identifier), enter an identifier and tap Continue.
Insert the card.
If necessary, ask the customer to enter a PIN or sign a signature. Tap Skip to skip the PIN.
Select how customers will receive their receipt or tap Cancel transaction or Refuse signature to invalidate the payment.
Tap Done.
Taking a contactless payment
Open the Pay App on your Clover device.
Enter the sale amount and tap Checkout.
If you enabled Ask for a billing number (or your custom identifier), enter an identifier and tap Continue.
Hold the card or phone over the contactless EMV logo.
Ask the customer to sign or enter a PIN if required.
If the customer has signed, select Verify to accept the signature.
Select how customers will receive their receipt or tap Cancel transaction to invalidate the payment.
Tap Done.
Sorting inventory & checkout app
Through Clover and/or the Clover dashboard, you can sort items in the inventory/checkout app. Follow the steps below to do this.
Via the Clover
Log in
Open the inventory app.
Press categories.
In this view, you can arrange the categories by placing your finger on the three dashes on the right and then dragging the desired category up or down.
Tap on one of the categories
In this view, you can arrange the Items in the open category by placing your finger on the three dashes on the right and then dragging the desired item up or down.
The order you set here will thus also be visible in the checkout app.
Via the Clover Dashboard
Log in
Click Inventory in the left-hand menu.
Select categories.
At the top right of the screen, click on 'Change classification'.
You can now change the order of the categories by dragging them to the right place
Arranging items within a category can be done by first selecting the category and then clicking on 'change classification'.
In the new window, you can put the items in a desired order by dragging them with the mouse.
Then click on save.
The order you set here will also be visible in the checkout app.
Do you have more than 1 Clover device?
If you make the change in the dashboard or on one of your Clover devices, the settings will also become active on all other machines within +/- 10 seconds, provided they are connected to the internet.
Reporting App
Log in with your unique code and then, in the main menu, open the reporting app. Through this app, you can find and print the day summary. By default, when you open this app, it selects today's date, and "All Devices" is chosen. This means you will see a day overview of all transactions on all Clover machines you have.
Note: If you log in with "Quick Access," the app will not display any information.
You can change the overview by pressing "All Devices" at the top to show only "This Device," so you only see the data from the machine you have in front of you.
You can also adjust the date by pressing "Today." In addition to some standard options like "Yesterday" and "Last 7 days," you can choose a custom date or period by pressing "Custom."
If you have a closing time after midnight, keep in mind that you can only select the date after midnight. You cannot select a future date. In this case, at the end of the day, select yesterday's date with the opening time as the start date and the current date and time until, for example, 02:00 as the end date.
Reporting via Clover Dashboard
A similar report can be viewed through your web browser on your laptop, smartphone, tablet, PC, etc. When you log in to eu.clover.com/dashboard, you can choose Reporting in the left menu. By default, the sales overview is displayed here. If you then press "Full Report" in the top right, you will get the same overview as on the Clover payment terminal itself.
You can export the report (as a CSV file) or print it. (On most computers, when printing, you can also choose "Save as PDF.")